This article may contain affiliate / compensated links. For full information, please see our disclaimer here.
Have you ever made a delicious meal and wish it could be shared with more than just your family? Have secret cooking hacks that you think people could benefit from? Dreamed of writing restaurant reviews in cities around the world?
Well, a food blog is the perfect outlet to accomplish all these things… while making a pretty penny, on the side!
In this article, I’m going to walk you through the step-by-step process of how to start a food blog.
Today, home cooks and foodies all over the world are able to make money from their passion for food through blogging. There are actually food bloggers making a small fortune from posting their recipes online, sharing their cooking secrets, and advertising on their blog…
Seriously, can you imagine an extra $7,000 a month from blogging about food? With the right dedication, this dream is possible!
Now, at this point, you must be wondering how to start a food blog of your own… because if you’re an avid home food lover, why not profit from sharing your food experiences with the world?
The best part is that anyone can start a food blog (yes, anyone!) so long as you love food (and writing about it), of course!
While going through this article, you’ll find tons of information not only about setting up your blog but also specific food blog tips that will help your website to stand out from the sea of other food blogs out there.
Although the thought of starting a food blog may seem intimidating or overwhelming, don’t let this stand in your way!
It’s actually a really straightforward process that you can accomplish in less than an hour. Just follow these 5 steps and you’ll have a food blog of your own by the end of this article!
How to Start a Food Blog in 5 Steps
- Step #1: Decide on Your Food Blog Topic
- Step #2: Choose a Blog Name
- Step #3: Register Your Domain and Get Hosting
- Step #4: Set Up Your Blog on WordPress and Launch It
- Step #5: Start Blogging!
- Bonus: Make Money With Your Food Blog
I’ve outlined these 5 steps so that you can follow along while starting your food blog.
No matter what you’ve heard about starting a blog, with the right instruction, this process can be simple and by the end of this article, you’ll have your very own food blog up and running.
Here’s everything you need to do if you’re wondering how to start a food blog!
Step #1: Decide on Your Food Blog Topic
First thing’s first: decide what type of food blog you want to start.
With so many food blogs already in existence, it’s best to choose a super specific topic (aka a niche) to help you stand out from the rest of the blogs online.
Some food blog topics may be:
- Easy Italian home cooking
- Healthy cooking for kids
- Weeknight meals for 2
- Luxury meals on a budget
- Authentic Mexican recipes
- NYC deli reviews
As you can see, each of these food blog niches are really narrowed down and hyper-specific, allowing a specific audience to find exactly what they’re looking for.
If you want to increase your chances of seeing success and actually making money from your blog, niching down is key!
I know a lot of people are afraid of niching down, but trust me this has to be our biggest advice! Start niche and later on, once you’ve built a solid tribe, you can expand to other areas and topics.
Beyond just helping interested readers finding your blog, a super solid niche also helps you build authority in the eyes of Google. When you have a specific niche and create content surrounding it, Google will easily be able to understand that your food blog has to do with a certain topic.
This helps so much with traffic because if Google believes you have authority on a topic, it will rank your articles higher on search engine results.
If you need some help coming up with a specific food blog topic for your blog, check out our article about finding a profitable blogging niche to get started!
Step #2: Choose a Blog Name
Once you know what you want to blog about specifically, it’s time to start thinking about a name.
While everyone wants the perfect name for their blog, don’t let choosing a food blog name hold up your process. It’s best to decide on something catchy and quick, without harping on it for too long.
When naming your food blog, try to include keywords related to your niche and use interesting word choices to keep things relevant for your readers. It also helps to use techniques like alliteration, puns, and plays on words to craft a name that will stick out in people’s minds.
Since there are thousands (if not millions) of food blogs already out there, seek inspiration from some existing food blog names to see what’s working well.
Names like these are particularly catchy:
- Pinch of Yum
- Butter Me Up Brooklyn
- A Couple Cooks
- The Stay at Home Chef
- Fork Knife Swoon
You can also find a gigantic list of food blog name ideas, naming tips, and examples in this article.
If you need some more help coming up with a food blog name, try out a blog name generator! These online tools allow you to plug in different keywords in return for blog name ideas related to your niche.
We’ve actually developed our own blog name generator to make the process that much easier.
Once you come up with a name that you really like, plug it into this widget below to see if it’s available.
Step #3: Register Your Domain and Get Hosting
After coming up with a name you’re happy with, it’s time to register the domain (the specific URL) so nobody else can snag it.
You can register a domain on its own for about $10 a year, but this isn’t enough to get your blog up and running. In fact, purchasing the domain name only claims the blog name so that no one else can take it… nothing else.
You’ll need blog hosting to actually turn your domain name into a full-blown website!
In this section, you’ll be able to get hosting and a domain set up in less than 10 minutes for your food blog.
If you’re hoping to make money with your blog, you’ll need a self-hosted website. While you can start a blog on a free platform, there are loads of limits and restrictions, mostly around making money and advertising.
Blogging on free platforms also means giving up ownership of your content and running the risk of losing your entire blog if they shut down.
Self-hosting is a must because it gives you the complete freedom to do whatever you want with your blog instead of being bogged down by shady terms and conditions found on free platforms.
Food Blog Hosting Recommendation: Bluehost
There are plenty of different hosting options, but we like to recommend Bluehost because of how affordable they are.
Not only is Bluehost the most affordable hosting network, but when you purchase hosting through them, you also get a domain name included for free for a year.
Besides the unbeatable price, some reasons we love Bluehost are:
- They’re the most trusted and affordable hosting provider. Bluehost is one of the most used hosting networks online! It’s perfect for beginner and advanced bloggers alike. We ourselves use them for this blog!
- They have great customer service who can solve pretty much any problem thrown their way. We actually switched to Bluehost after having a horrible customer service experience with our last hosting provider. They’ve made a lot of upgrades and changes to their customer service and we couldn’t be happier.
- They offer a FREE 30-day moneyback guarantee so you can make sure they’re the right choice for you.
- You can get hosting before deciding on a domain name.
- They’re ultra compatible with WordPress for an even easier set-up experience. They even have a 1-click WordPress install, making the entire process super easy.
As I’ve mentioned, we use Bluehost ourselves which is why we’re able to recommend them full-heartedly. We’ve genuinely had an awesome experience with them, which is why we’re confident in suggesting Bluehost to all of our readers.
If price is a concern with starting your blog, you’ll be happy to know that in addition to a free domain name, with our discount, you can purchase hosting for 63% off from Bluehost.
That means you can start a blog for less than the price of a cup of coffee each month!
How to Get Hosting: Video Tutorial
If you’re a visual learner, here’s a quick and easy way to set up hosting.
Watch the video below which breaks down everything you need to know. You can also keep scrolling for our step-by-step instructions!
How to Get Hosting: Step-by-Step Breakdown
Once you click the button above, click “Get Started Now” on the Bluehost page to check out the plans available.
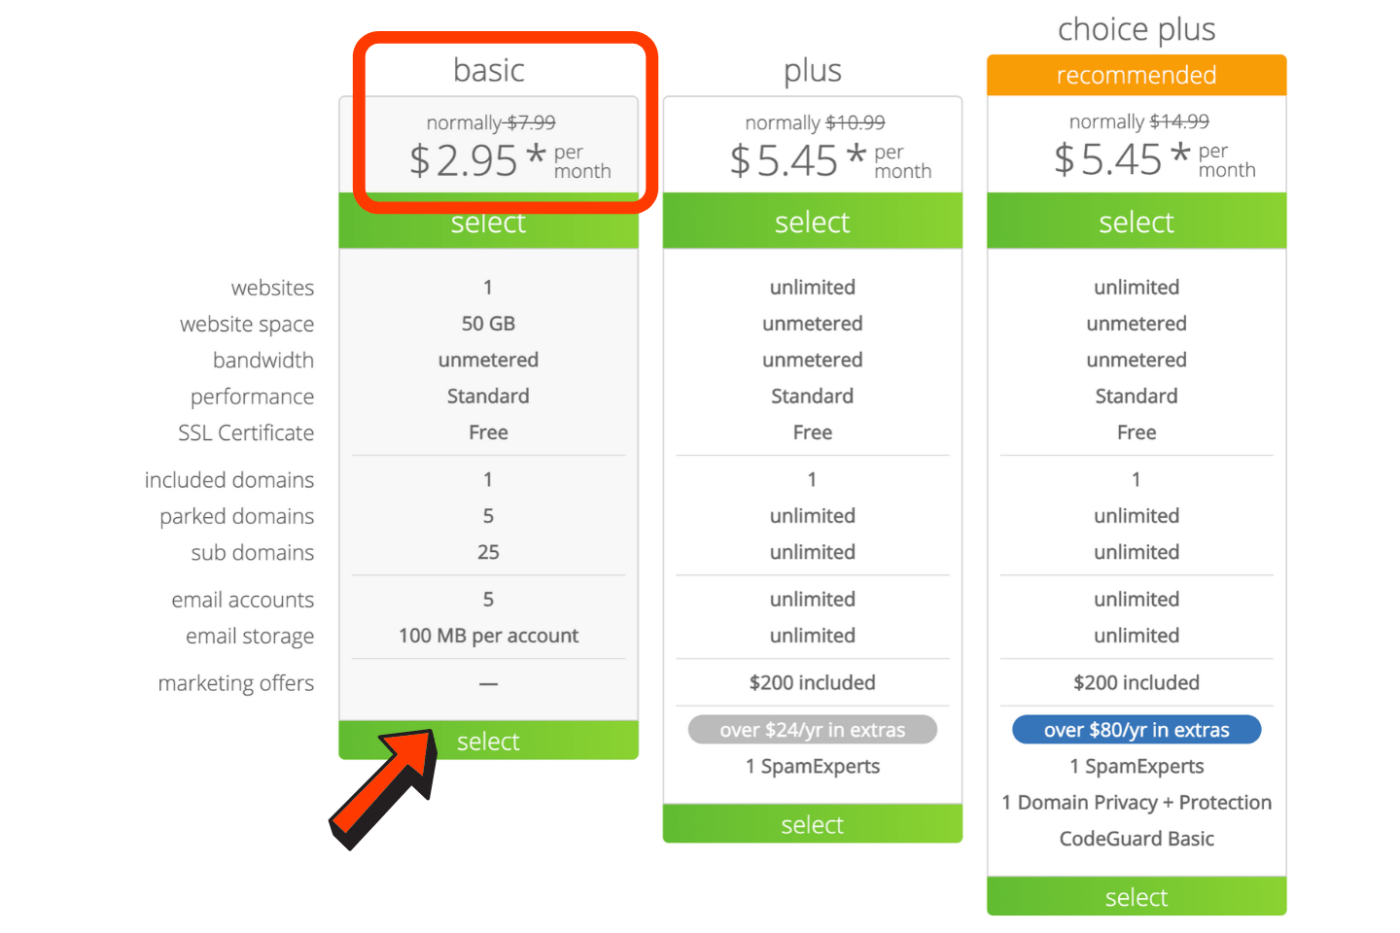
You’ll notice that there are 3 different choices for hosting packages: Basic, Plus and Prime.
If you’re blogging on a budget, the Basic plan will suit your needs just fine for starting a food blog.
You can also upgrade plans whenever you’d like, so no stress if you need the extra features down the road! In our experience, the Basic plan is more than enough and you don’t need any of the other bells and whistles.
Once you decide which plan is best for you, choose “select”, and you’ll hop to the next page where you can register your domain name.
Registering your domain name is a big step as this is what your actual blog is going to be called!
Remember, with Bluehost, your domain name is included for a year with your hosting purchase.
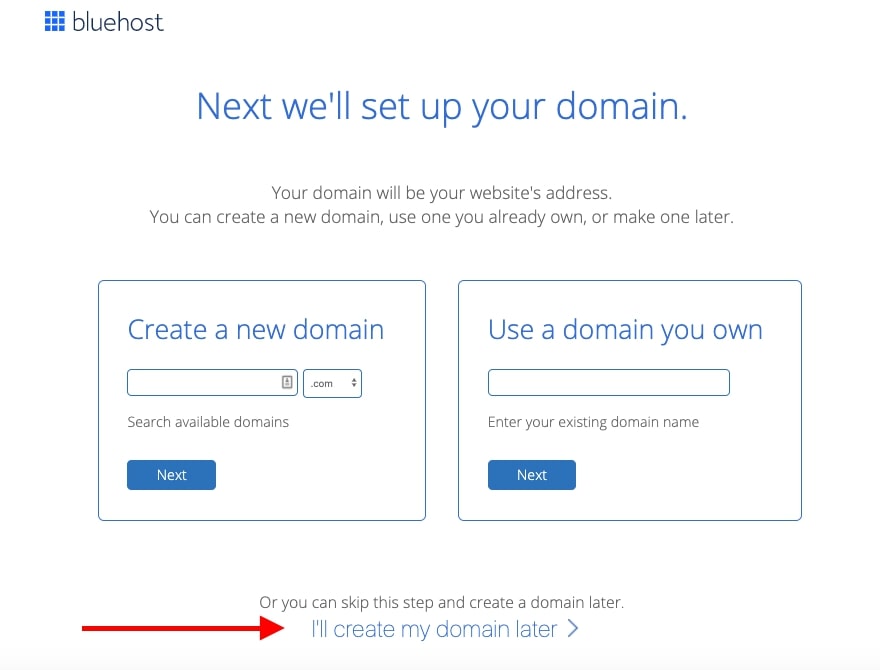
Type your food blog name into the “Create a new domain” box to double check that it’s available.
When it comes to choosing a domain name, we highly recommend sticking to a .com address. This is the easiest type of address for search engines to read, allowing you to rank higher for relevant topics.
If you’re stuck coming up with a name but still want to move forward with the process, Bluehost allows you to get started and add a domain name later. Simply click “I’ll create my domain later” and you’ll be able to move on to the next step.
After securing your domain name, it’s time to create your account and pay.
During this step, you’ll be asked to add on any extras (you can pass on those), and review your package.
Keep in mind that purchasing the Basic plan for 36 months gives you the best deal and 3 full years of hosting for your blog. If you decide to opt for a single year, the plan will cost more per month.
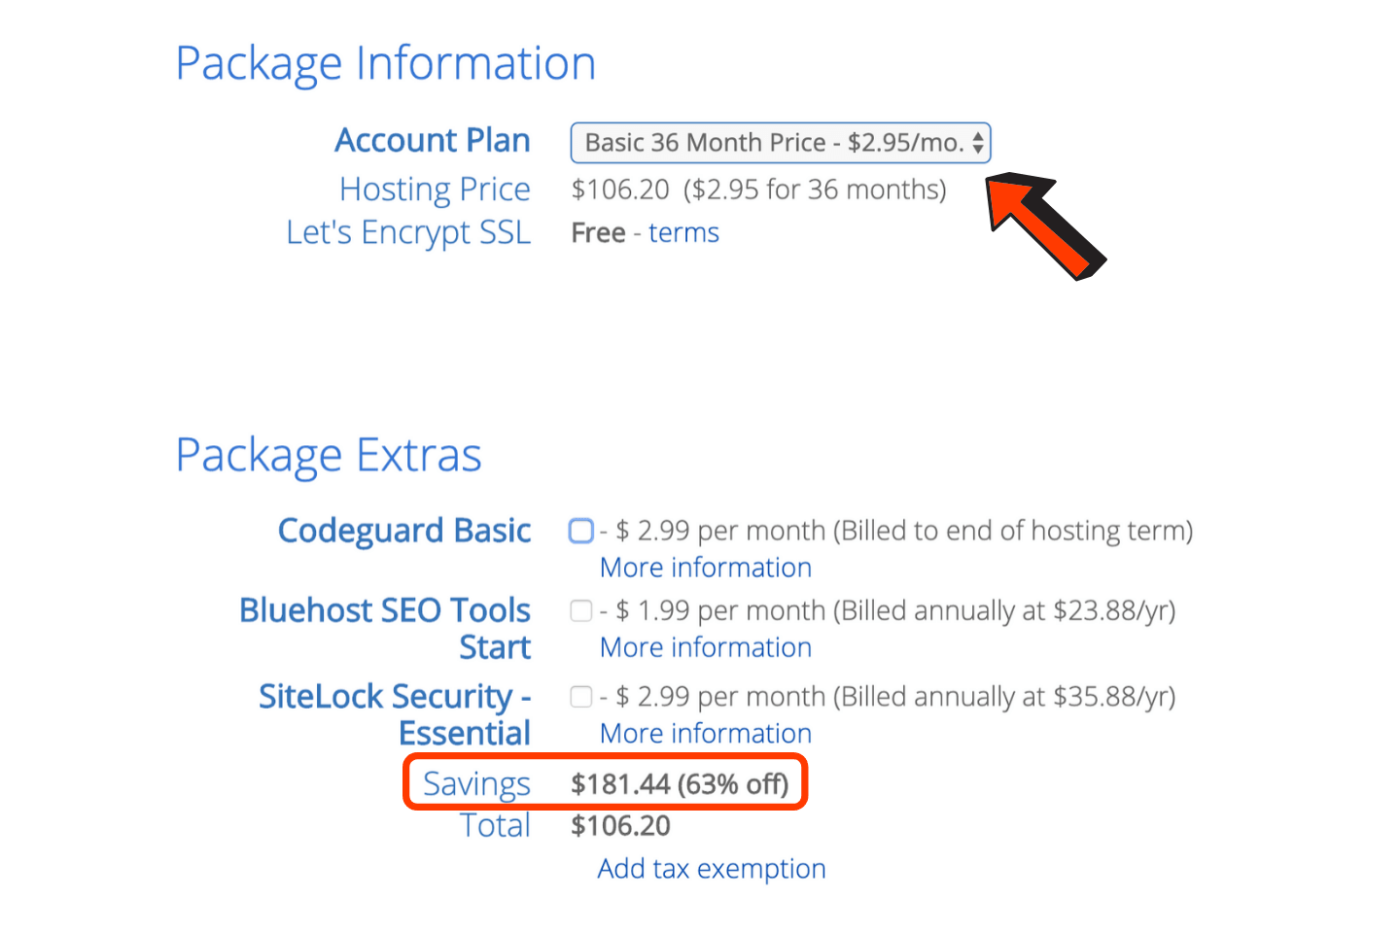
When everything looks okay, it’s time to pay and submit! As you can see from the screenshot above, the Basic plan for 36 month saves you a whopping $181.44 when you use our discounted Bluehost link.
Note: Please keep in mind that our discount may vary depending on Bluehost’s own promotions and that taxes may be added on at the end, depending on which country you’re buying from.
And that’s it!
After you submit your payment, you’ll be ready to set your blog up and get it launched… whoopie!
Step #4: Set Up Your Blog on WordPress and Launch It
Now that you have hosting for your blog, you can actually get it set up on the internet.
The first step to do this is to install WordPress which I will show you how to do in the section below.
WordPress.org is a content management system for self-hosted blogs and is also completely free to use. This is what we’re talking about when we refer to WordPress.
With WordPress.org, you completely own your blog and are able to do whatever you’d like with it (including monetization).
Install WordPress
As mentioned, WordPress.org is (by far) the most popular content management system for bloggers and actually powers 35% of the internet.
Don’t mix up WordPress.org and WordPress.com. WordPress.com is a free blogging platform that allows people to start a blog hosted on their server. If you start a blog on WordPress.com, your blog name will be something like “www.myblog.wordpress.com”.
Since Bluehost is directly compatible with WordPress, setting up your blog will be a breeze.
After you finish signing up and paying for hosting, Bluehost will actually walk you through how to install WordPress through their 1-click install.
If you’re doing this another time though, all you have to do is head to your main dashboard on Bluehost, choose “My Sites” from the sidebar and click “Create Site”.
You’ll be guided through what to do next, but basically once you input your site’s name and tagline, and choose your domain name, WordPress will be fully installed for your food blog!

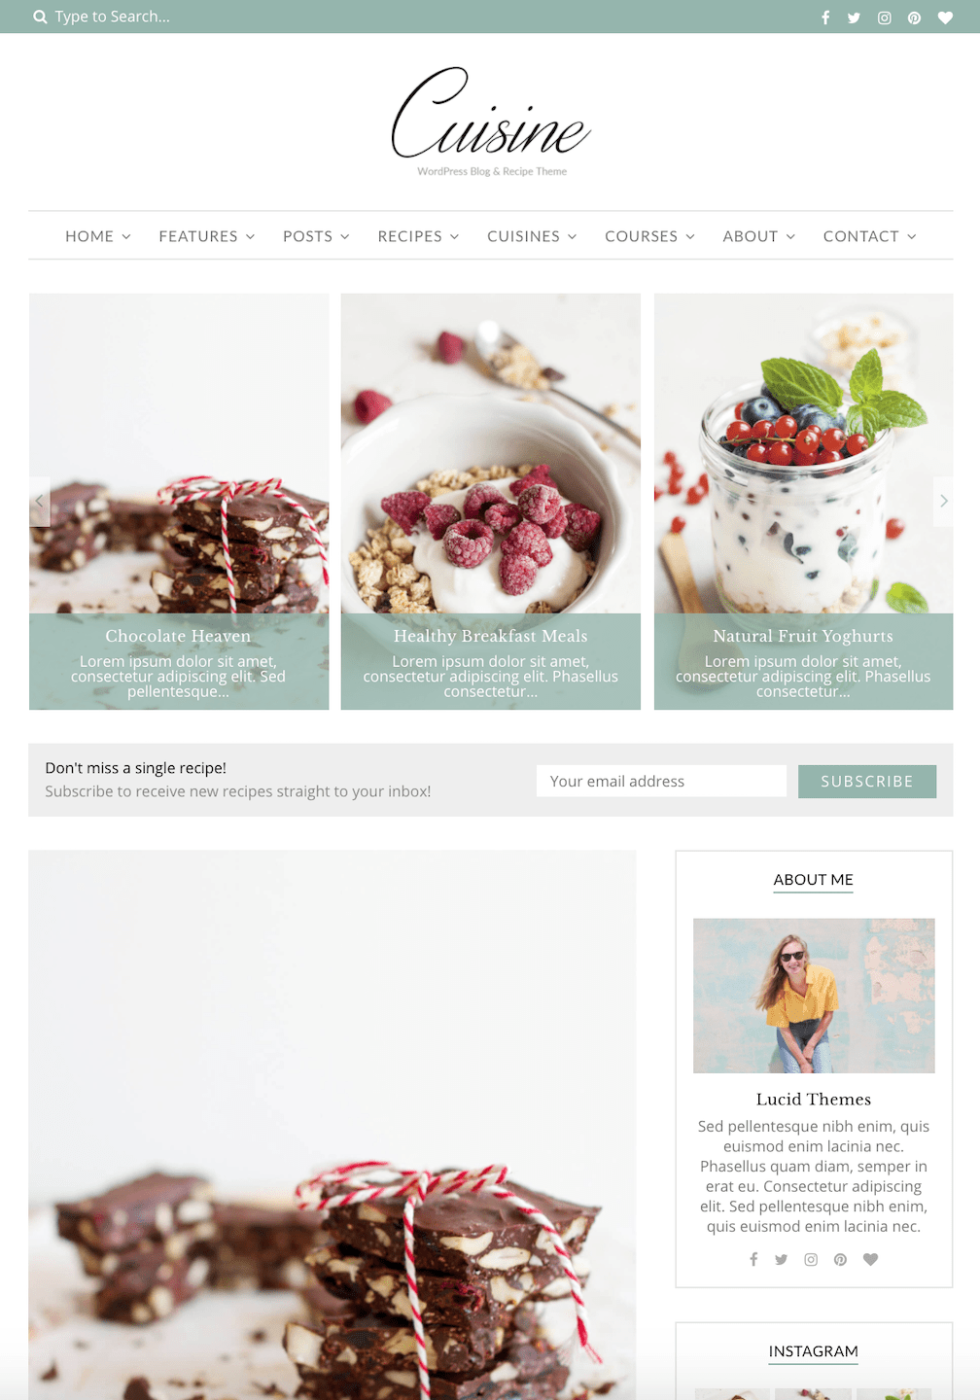
Pick a WordPress Theme for Your Food Blog
Now the real fun starts… It’s time to make your food blog your own!
If you’re stressed thinking about designing your food blog, let me dispel your worries right away. With WordPress themes, you can have your entire blog designed for you.
All you have to do is plug in your own content and tweak things to make it fit your style.
WordPress themes are a lifesaver as they allow you to create an entire website without a drop of coding knowledge or experience. Yes, you heard me!
The only problem is there are so many available!
When choosing a theme, keep in mind that not all are created equal.
While you won’t have to pay for free food blog themes, they’ll have super limited customization options compared to premium themes. Premium themes cost anywhere from $50 to $80 and will have a much wider range of customization abilities.
When you’re creating your food blog, it may be worth splurging on a premium theme as many of them come with recipe card options and certain elements unique to food blogging. However, if you’re really on a budget, you can always start with a free theme and switch over to a premium one later on.
Personally, we recommend getting a premium theme from the get-go as it will save you tons of time down the road.
So that you don’t have to sort through tens of thousands of themes on your own, we’ve compiled the best food blog themes into a single article!
Customize Your Blog
After getting a theme sorted, you can begin to customize your food blog to have it reflect your personal style.
There are certain design elements that every blog should include like a homepage, navigation bar, and sidebar, with lots of room for customization on how they look.
When designing your blog, you should also keep in mind things like your color scheme, white space, and readability of text.
You’ll also want to customize your blog to ensure that it includes necessary elements like a blog bio, contact pages, and header/footer so that all the pertinent information is available to readers.
Don’t forget to flesh out the information you post and include engaging images to give your readers a glimpse into who’s behind the screen.
For more tips on customization, check out our article that covers all you need to know about blog design!
Must-Have Plugins for Food Blogs
One of the great things about WordPress is you can make it completely fit your needs by installing plugins.
WordPress plugins are little bits of pre-built code that you can attach to your blog to extend the features or functionality.
There are thousands of WordPress plugins that can do anything from customizing your blog to providing security to integrating social media and beyond.
There’s practically a plugin for everything!
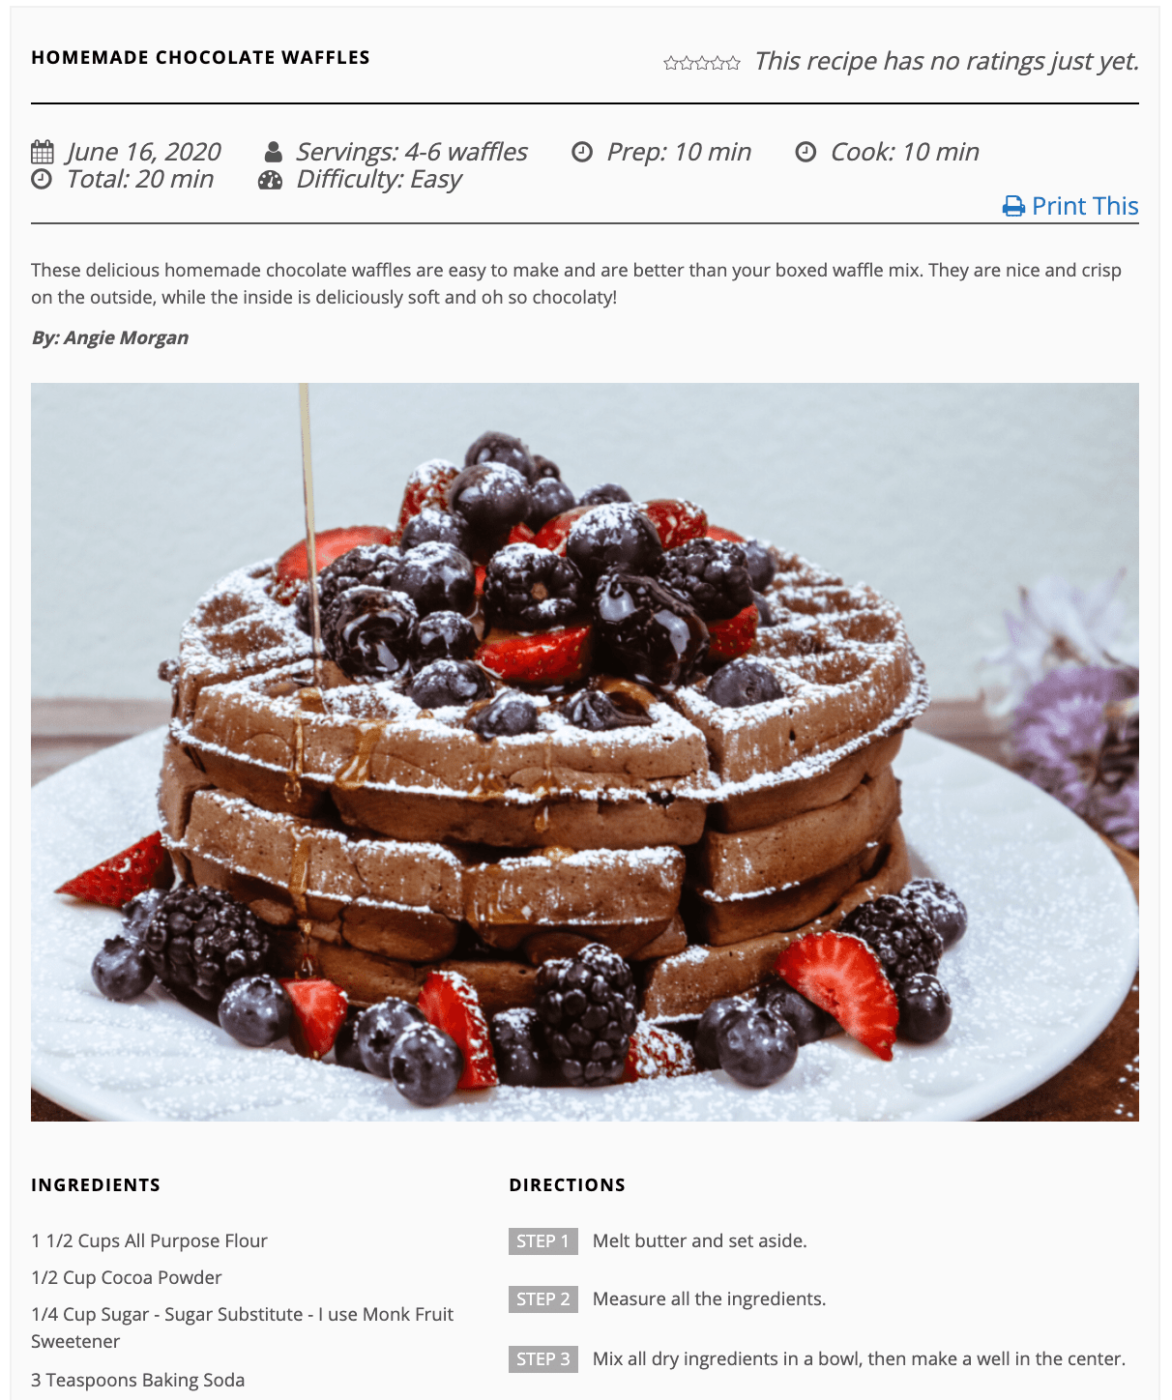
Some must-have plugins for food bloggers are:
- Recipe Card: Display stunning recipes on your blog with this free plugin. It comes with different templates to use and the option for readers to print and save your recipes.
- WP Ultimate Recipe: Embed recipes on your food blog with this plugin. You can create tons of different categories, and there’s a premium option if you’d like more customization control.
- Recipe Hero: This creates a custom post type for when you want to upload recipes on your food blog. There are lots of display options with this plugin and you can even add a responsive image gallery.
- Yoast SEO: For optimizing your food blog content, this plugin is a must. It gives you tips for optimizing your writing and also gives you the ability to edit post URLs and meta descriptions.
- Monster Insights: This plugin creates a Google Analytics dashboard right on WordPress so you can easily check blog stats without leaving your site.
While this is barely scratching the surface of plugins, you can explore all of the options available by navigating to your WordPress dashboard, clicking “plugins” on the sidebar, and then selecting “add new”.
Step #5: Start Blogging!
After getting your entire blog set up and customized to your liking, it’s time to actually start blogging!
The main thing to keep in mind when you start your blogging journey is that content is king.
What matters the most is providing valuable content to your readers that will make them want to come back for more. Whether it’s recipes, kitchen tips and tricks, or any other food-related topics, stick to your niche and write your heart out!
When you first start blogging, there are a million different things to accomplish but if you focus most of your energy on building out content and getting it ranking on Google, you’ll be setting yourself up for long-term success.
To write strong content, it really helps to start with a blog post outline to create a roadmap of where you’re going with an article. It’s also super important to do your keyword research to find out what words you should target in your content.
Keysearch is a super affordable tool that has both yearly AND monthly plans. If you would like to try the tool, use the coupon code “FASTLANE” for a discount!
From there, you can go ahead and write your entire blog post and finish it off with a catchy headline before putting it out into the world.
It’s an artform to write blog posts that people will keep reading, and it takes lots of practice. But this is something every successful blogger learns to do with ease over time.
Get in the groove of writing great content for your food blog and see what works best for you. Who knows, your opportunity to become the next Martha Stewart could be right around the corner!
Make Money With Your Food Blog
Once you get your food blog set up, you must be wondering, “Okay…so, how do I make money with this thing?”.
When it comes to blogging, you need to remember that it isn’t a get-rich-quick scheme.
It’ll take some time to lay the foundations of your blog before you start earning from it. However, with that being said, with the right strategy, it isn’t impossible! Loads of home cooks and foodies are doing it on a daily basis.
There are also loads of different ways to make money from a food blog… it just depends on what kind of monetization strategy you’re after.
You can create and sell digital products, start a membership section on your website, or make room for display ads. You can even start an online course to teach your readers how to cook or sell your very own cookbook!
If you’re looking for detailed tips on how to grow your food blog and make money from it, check out our free training where we walk you through our methods for monetizing a blog!

Overall, if you hope to make money from your blog, you should know that although it can be a long journey, it is one that is wildly rewarding.
We’ve seen people replace their full-time incomes and ultimately profit from something they love doing.
After reading this, hopefully you see how easy it is to start a food blog in 2022!
While it certainly takes some time to get everything looking just right on your blog and truly building out your content, the best thing you can do is start a food blog now so you can get rocking and rolling with the rest.
So go on, what are you waiting for?
Like this Article? Pin it!